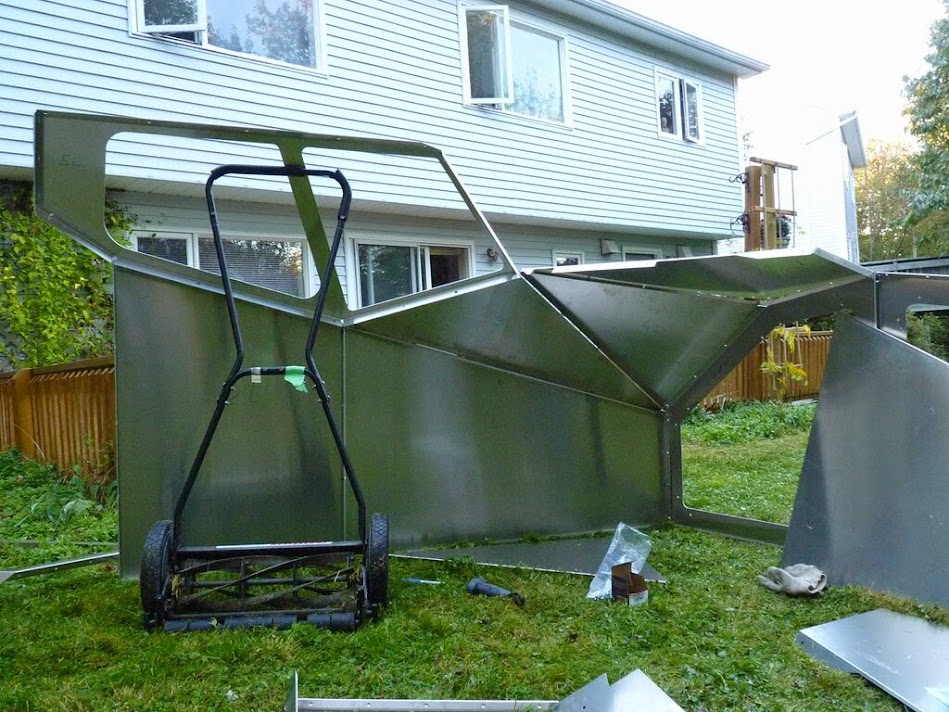
I bought aluminum FDS shell - just bare aluminum version without black powder coating.
Here is the box with the shell parts on arrival. Somewhat damaged, but all parts were there.
First thing highly recommended to do: spend a couple of evenings and file all the edges with some flat file and then go over again with sandpaper. You will avoid the hand and finger cuts later and will be able to work with the shell without gloves.
There is no any assembly manual with this over $2000 product. Yes, I know, any small bookcase from Wal-Mart for $35 has one.
It might look easy, however there are some parts very similar in shape and size (in addition to their right and left versions) which are very easy to mix on the first try.

Try to spend some time to lay all the parts on the floor or backyard and figure out where they go. Then mark them something like this.
I even marked which edge goes where. Does not hurt.
I also assembled half of the shell using just a few bolts and something to support it.
Then I assembled it on the sim base, starting with the front and going to back, using just lower parts - no roof. Skipped two lower panels to provide temporary easier access to the seats.
Then side windows went in, then back arc.
Depending on your needs you may try not to assemble using all the bolts from the first try - you might need to disassemble it later for something else to do. While heavy overhead was not hanging there yet - the structure held strong for me even with just a couple of bolts on each panel edge.
I assembled/reassembled it several times. First I assembled shell parts not painted. In general, shell parts are precise enough, however, considering their large size some fitting work may be needed. You might need to adjust some parts for each other, file or drill some holes wider, and even cut some small corners to make a tight fit. I also needed to cut sides of my MIP stand to fit in the shell front.
Next time I disassembled the shell to make the final measurements how to fit my TQ and yoke columns.
At the same time I painted the shell black from outside. I just applied the matte black paint to bare aluminum, no sanding or special primers used. Aluminum primers typically are poisonous chemicals and I did not want to deal with them. I used aluminum primers only for small parts, for example on my yoke clipboards.
I know that paint on bare aluminum applied this way does not hold very well and can be easily scratched, however since it is not a real plane or car that works under weather - this way is cheap and half a year practice of running around the cockpit tells me that it's good enough.
Shell modification: "bonnet" or "hood".
Of course installed shell limits your access to the back of the MIP that you need for maintenance and repairs. While there are big "holes" in the front of the shell, still access to the top of the MIP's back is limited.
Looking at that I decided to make a modification and now my 737 has the car-like "bonnet" or "hood".
What I did - I cut the parts of front panels that are bolted right under front windows. Now the window frame is permanently bolted in place.
The cut parts are connected to it with continuous hinges just like piano's lid.
I opted for installing the hinges over the panels rather under them. I tried both ways, and while location under is more "sleek", when opening the "bonnet" it's angle will be limited by obvious reason - the parts will be closing on each other:
So, hinges on outside covered by black duct tape will work just fine, and they are not visible from inside the cockpit.
I reinforced the front "bar" that goes from he middle of front windows with another aluminum angle profile, and made a wooden cross-bar supporting the center of front window frame.
Now, if I remove the bolts from front panels I can easily open the "bonnet" on each side and have easy access to the top of the MIP.
In addition, other side panels next to opening ones can be easily un-bolted now, if needed.
So, here is the final version of 737 "bonnet" (not covered with duct tape yet)
Added DIY Map Lights
Built for about $20 each of hardware parts from Home Depot.
The parts set:
LED light (8 watts) painted black.
The U-shaped holder cut from aluminum profile:
Basically it's just assembly work, only 5 holes drilled in plastic parts and 3 holes in holder.
Installed:


No comments:
Post a Comment